
Towards the end of September, I published a post with the title Cross-stitch Software Evaluation, which had included several images. Well, after publishing that post, I decided to go ahead and stitch some of those festive-themed designs, but before my stitching could commence, I was required to have S.E.X. (a stash enhancing experience). Sorry folks, but that stitchy acronym never fails to amuse me!
All the designs you see featured below were stitched on 18-count Aida, using metallic thread. The cards I used measure 144mm x 144mm, and the dimension of the aperture is 96mm x 96mm. I purchased a bulk quantity of the cards from Craft Creations several years ago, so that was one thing less to worry about when I had S.E.X. Having checked the website, they are still available for purchase, along with envelopes, clear card bags, and plain insert sheets. Craft Creations do stock printed inserts sheets, although not for the size of cards I used. However, it’s not that difficult to turn a plain insert sheet into a printed insert sheet, bearing a greeting of your choice, but I’ll explain more about this later. Finally, the cards were embellished with peel-off stickers that had also been purchased from Craft Creations.
 | |
| Christmas Bauble |
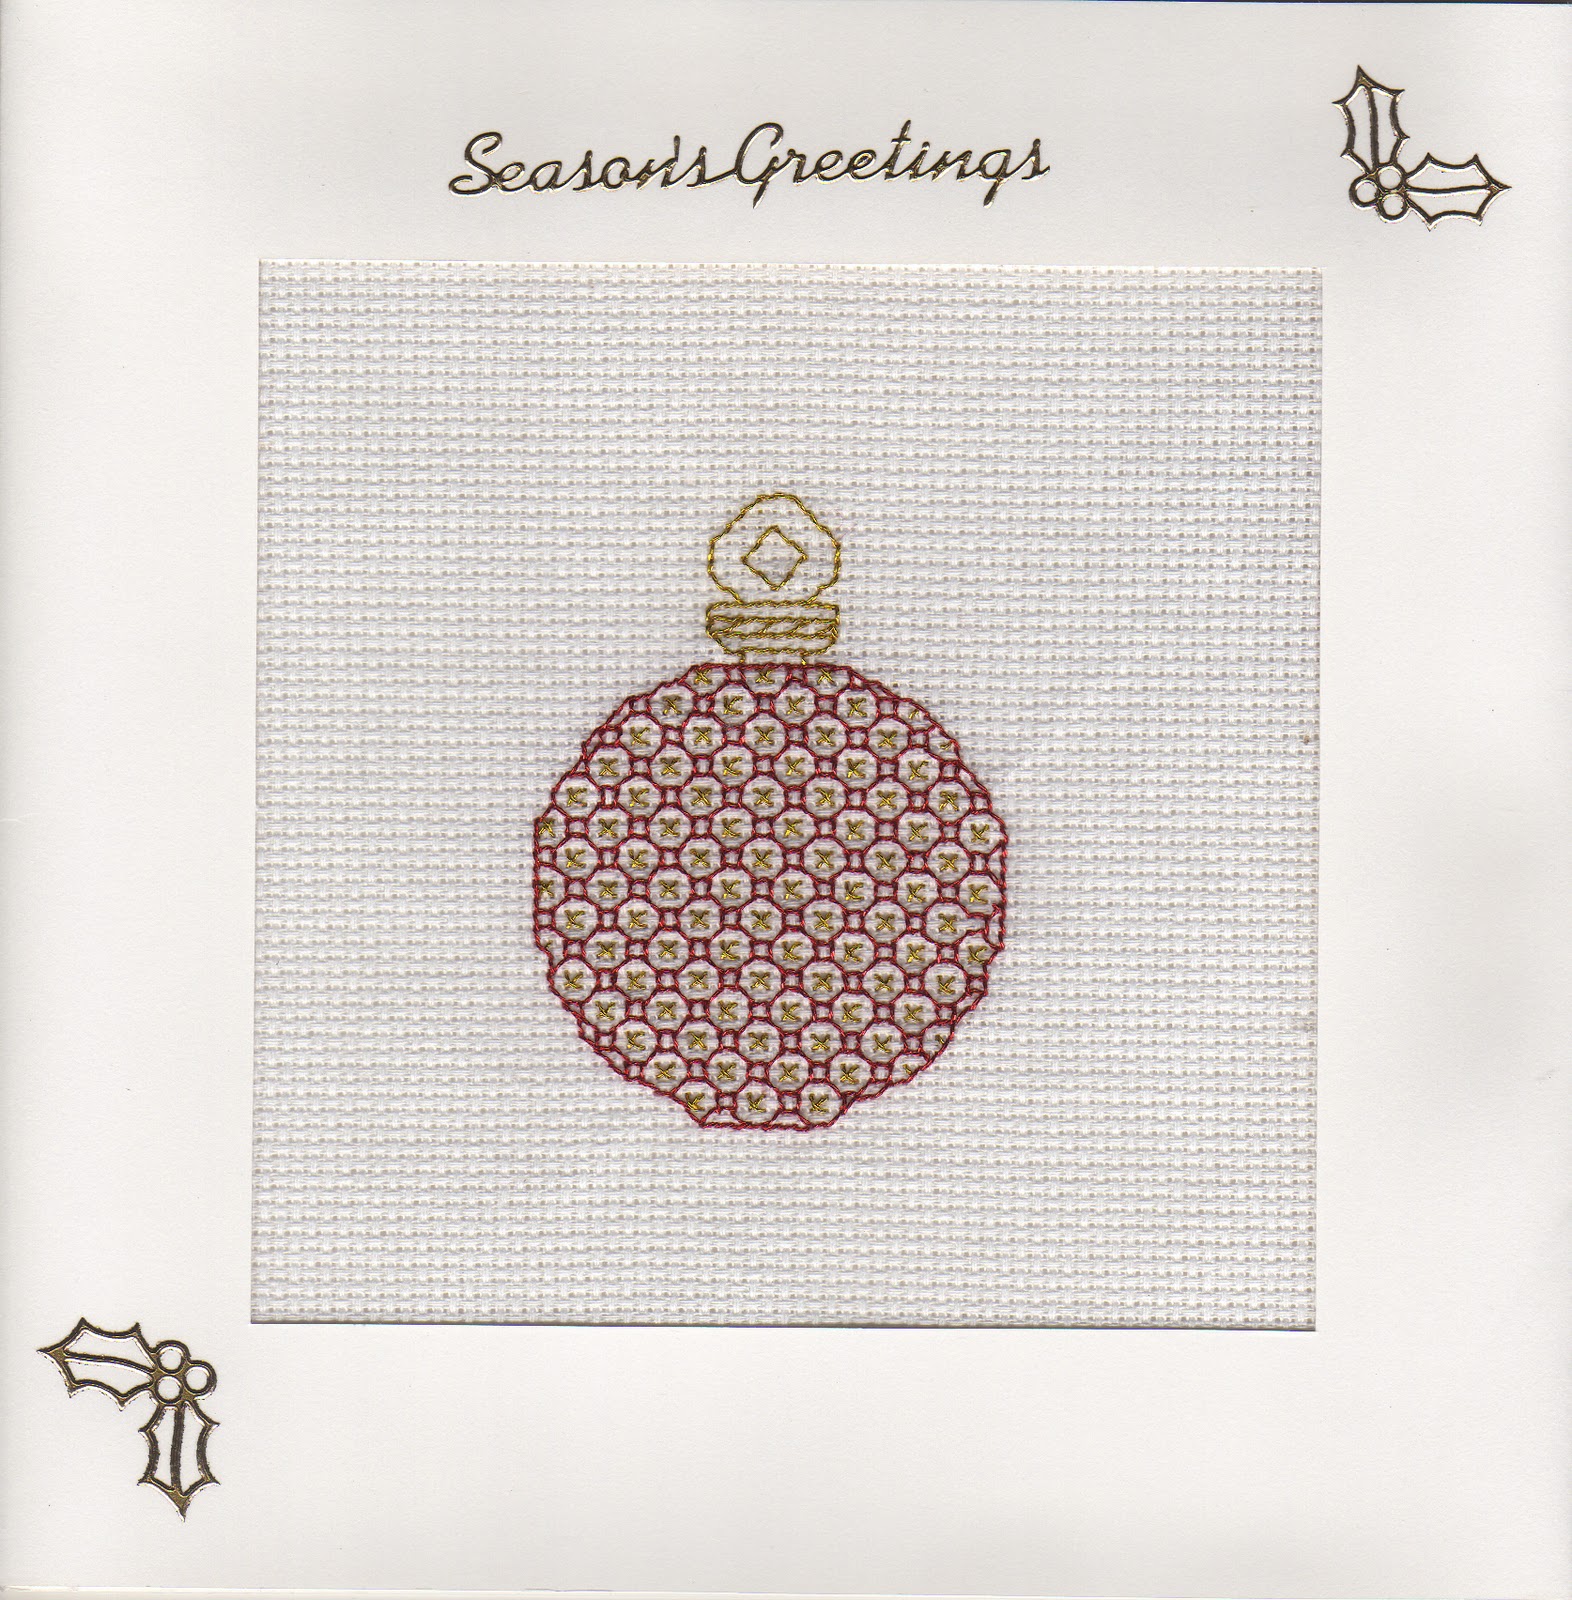 |
| Christmas Bauble |
 |
| Christmas Bell |
On the chart I followed for this design, the clapper (the bulbous part at the bottom of the bell) hadn’t been filled, nor had the bell’s hook, and I personally felt the design would look so much better if they were. I used one strand of DMC E3852 (gold) for the Blackwork and the cross-stitches.
 |
| Christmas Present |
I have to confess that I found this design to be an absolute nightmare to stitch. The ribbon on the chart I followed hadn’t been filled, but I opted to fill it because I really wanted it to stand out. For the present, I used one strand of DMC E3852 (gold), and E321 (red) for the ribbon. I should add that I used two strands to outline the ribbon.
 |
| Christmas Stocking |
When one looks at a Christmas stocking, furry fabric is often used for the trim at the top. I wanted to try to replicate that look when I stitched this design, so used two strands to outline the trim. The rest of the stocking was stitched with one strand of DMC E3852 (gold), and E321 (red).
 |
| Christmas Tree |
The tree was stitched with one strand of DMC E699 (green). On the chart I followed, the trunk had been stitched using the same colour that had been used for the tree. Well, I don’t know about you, but I’ve never seen a tree with a green trunk! As the DMC range does not include metallic brown, it was a matter of searching for a brand that did. Eventually, I took a gamble and placed an order for Madeira Metallic No.4, colour 4029. This is the first time that I’ve used Madeira, and separating the strands was quite a challenge. However, the shade is perfect, so the gamble paid off.
 |
| Christmas Wreath |
On the chart for this design, all the stitching for the wreath (not the ribbon) was green, and I found myself thinking, “But one can’t have a Christmas wreath without berries!” I used one strand of DMC E699 (green) for the wreath, and one strand of E321 (red) for the ribbon. As for the all-important berries, I used Mill Hill glass seed beads (shade 02013).
There are some more festive-themed items that I’ve stitched, but before they can be made up into cards, they will all need to be washed. This is something I prefer to do in bulk, and as there are more items I would like to stitch, I’m afraid it will be a matter of waiting and watching this space.
Unless you have the patience to use whatever tools are at your disposal to cut a quantity of paper to size, I would advise using pre-cut insert sheets. At the time of writing this, Craft Creations are charging £0.07 per printed sheet measuring 88 x 114mm, and £0.03 per plain sheet, meaning that it’s more economical to purchase the plain insert sheets.
When printing on to plain insert sheets, I prefer to use Microsoft Word. The first step is to change the paper size to Custom size, by accessing Page Setup from the File menu. In this instance, the dimensions of my insert sheet (for a 144mm x 144mm card) are 138mm (height) x 276mm (width). After entering the dimensions (in centimetres), I then switch to the Margins tab. Now, I don’t want to add any text to the left-hand side of the insert sheet, and I know that I’d like a margin of 1.5cm around the right-hand side of the sheet. In order to set the left-hand margin, the width of the insert sheet (27.6cm) is halved (13.8cm), and then added to 1.5cm (15.3cm). In addition, the orientation needs to be changed to Landscape.
The next step is to add the text, and I prefer to do this by entering it into a Text Box, simply because it’s easier to reposition. By the way, you will need to ensure your view is set to Print Layout before inserting the Text Box. By default, Word will add a black border around the text box, but it’s easy enough to get rid of. All you need to do is right-click the Text Box and then select the option to Format Text Box. From the Colors and Lines tab, select the drop-down menu for the line colour, and choose No Line.
I hope I’ve explained the above clearly, but in the event that I haven’t, please let me know and I’ll see if I can put together a visual tutorial.
5 comments:
My goodness you've been busy! All of your ornaments turned out fantastic!
I LOVE them all! Seriously! And I agree with every single change you made! The filled-in elements look fantastic, a Christmas wreath does indeed need berries (I'm struggling with a variation of this myself on some gift stitching at the moment), and no, a tree trunk should most definitely NOT be green! DMC does have a dark bronze in the LE, but it is strange that they do not have a brown, and at any rate I love the way the Madeira turned out - maybe you could do a in-depth stitching review of the M metallics in future? *hint* *hint* I've heard a lot of good things about them, but have never actually used them, so I'm very curious as to what you think about them ;)
RE: Your Card Formatting - I love the text you used for the greetings, and the holly clip art. Leaving it line art, instead of using something coloured, really echoes the blackwork well. I think every one looks absolutely GORGEOUS. STUNNING, even. GORGEOUSLY STUNNING! ;)
P.S. I don't know why, but I can't get your slideshow to work for me; it's a grey box with a play button in the middle, but it won't play. That may entirely be due to something I have set wrong, but I just thought you might like to know on the very slim chance it's not :)
Karen & Aurelia - Thank you so much for your flattering comments.
I have to confess that I'm really rather pleased with the way these designs turned out. As us stitchers know, it's impossible to know for sure how a design will look until it's stitched.
Aurelia - The brown Madeira thread I used is actually classed as bronze, not that it matters as the shade is perfect for the tree trunk.
As for writing a review about Madeira metallic thread, I'll need to give it some serious thread. It is rather lovely, and also expensive!
I used gold peel-off stickers for the holly and text on the card, which have been in my stash for several years. While I may be good with using graphics software, I'm not THAT good! Lol.
The slidsehow? Are you referring to this post?
Your cards are just stunning! I loved the stitched designs when I saw them, but now they're made up into cards they look even more wonderful - it's really finished them off beautifully! :)
Thank you RD. Compared with stitched Christmas cards I've made in the past, I definitely think these Blackwork ones are my best yet.
Post a Comment